Often the user needs to change the drive letter for various reasons. This may be due to both the personal preferences of a particular user and programs that may require a specific path for storing files. After Microsoft released Windows 10, people began to have some confusion with volume names. So how do you change the drive letter in Windows 10? This is what we will talk about today.
So, to rename a specific volume we will use the system utility that Microsoft has kindly built into the OS. It's called "Disk Management".
- Go to the “Start” menu, select “Windows Tools” and select “Run”.

- Next, you need to enter “diskmgmt.msc” in the window that appears and click on “OK”. This is much easier than searching for the desired item in the control panel.

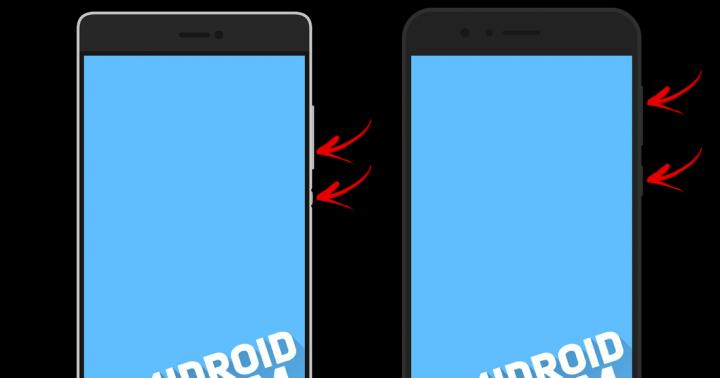
- A program window will open, displaying the hard drive with all partitions. Now you need to select the desired volume (F or D) and right-click. In the menu that appears, select “Change drive letter or drive path.” It is worth noting that the partition on which the operating system is installed cannot be renamed. It is also useful to know that if there are programs installed on the volume, then after renaming they may not work, since the path will not match.

- At the next stage, you just need to click on the “Change” button in the corresponding window. Don't forget that when you change the volume letter, the label also disappears. Therefore, you will have to re-enter it manually.

- Now the OS will prompt you to select a new partition letter. Remember that "A" won't do. This is the name of a floppy drive. You also won't be able to select "C" because that's the name of the system drive. The remaining letters are at your complete disposal. You can assign any one. After making your selection, click on the “OK” button.

During the renaming process, the user will see a warning from the operating system that programs installed on this partition will not work if renamed. You just need to press the confirmation key and wait for the process to complete. It is also recommended to restart your PC or laptop to apply all changes.
Using the command line
There is another way to change the local drive letter. It is suitable for those who are used to working with the command line, terminal or some other shell. But here you need some knowledge about Windows OS x32 Bit-x64 Bit. Although, if you do everything according to the instructions, it is not necessary.
- First, right-click on the “Start” menu and select “Command Prompt (Administrator).” All further actions will be carried out exactly this way. Otherwise it won't work.

- In the window that opens, enter the text “DiskPart” and press “Enter.” This command opens the console version of the application for managing disks, partitions or volumes.

- Next, you need to look at the list of volumes in order to find out which letters are assigned to the partitions and which they should be replaced with. You need to enter the command “list volume”.

- Now you need to select a specific volume. This can be done using a command like “select volume X”. X is the number of the required section.

- Finally, we enter the command to rename the volume. It looks like this: “assign letter = X”, where X is the letter that needs to be assigned. Don't forget to press the Enter key after entering each command.

After completing the renaming process and receiving the corresponding message, you will definitely need to restart your computer. However, it will still not be possible to rename the system partition this way. If you do this, the OS simply will not boot.
Using Windows PowerShell
PowerShell migrated to Microsoft's OS straight from Linux-like systems. This is a very powerful tool for managing the operating system. You can also use it to set a new name for the section.
- Open the Start menu, go to the Windows PowerShell folder, right-click on the application name and select Run as administrator.

- In the window that opens, enter “Get-Partition” by pressing Enter. It will show the number of partitions along with their designations.

- Next, enter the command “Get-Partition -DriveLetter X | Set-Partition -NewDriveLetter Y", where X is the letter of the partition that needs to be renamed, and Y is the new name of the same partition. After entering the command, you must press Enter.

Sometimes during an operation a message may appear: “The parameter is set incorrectly.” This means that you have messed up something with the command. Check your spelling carefully and try again. After completing the operation, be sure to restart your PC.
Conclusion
So, it turns out that assigning a new letter to a local drive is very easy. There are several ways to change the name using a system application or console. A USB flash drive can be renamed in exactly the same way. It is not possible to rename only the system disk and the Floppy drive. But it's not scary.
Video instruction
If you have any questions about the process of renaming a volume, you can additionally watch the video. There are plenty of lessons on this topic. Now your volumes will appear in Explorer exactly as you want.
In the Windows operating system, hard disk partitions are assigned specific drive letters. Windows assigns drive letters automatically, following the order of the letters of the English alphabet.
In this article we will look at how to change the drive letter if necessary. A computer may have one or more hard drives, and each hard drive may have multiple partitions (drives) that have different drive letters.
Additional logical partitions are created for more convenient use of the computer. When installing Windows, the operating system is installed on drive “C”. During system installation, or later, you can create additional partitions on your hard drive.
What is it for? To separate the system from other data. The operating system with accompanying data is located on drive “C”, and user files (music, videos, documents, etc.) are stored on another partition of the hard drive. This makes it easier to access the necessary data, due to a more understandable storage structure, and also in the event of an operating system failure.
After reinstalling the operating system, all information on drive “C” will be lost, and data on other drives will be saved.
I needed to change the drive letter to make Explorer more convenient to use. My computer has two hard drives. Windows was installed on the first hard drive (Local drives “C” and “D”) (drive “C”), and the operating system was installed on the second hard drive (now Local drive “E”), before upgrading the computer. The second hard drive is now used for data storage.
This hard drive was divided into two partitions (drives) “E” and “F”. Now I don't need to have multiple partitions on this hard drive because it is completely used for data storage only. So I combined the two sections into one ("E").
The drive letter “F” became free, and since the DVD drive had the drive letter “L,” then after connecting an external hard drive or USB flash drive, the external drive received the letter “F” and ended up in Explorer in front of the drive, which caused some inconvenience in perception. It’s more logical to do this: first the hard drives are displayed, then the drive, and then the connected drives. Therefore, I needed to assign a different letter to the drive (DVD drive).
In this image, the DVD RW drive has the drive letter "L" and I need to assign the drive letter "F" which is the next alphabetical drive letter after "E". An external hard drive under the letter “M” is permanently connected to my computer.
Attention! Do not change the drive letter on which the operating system is installed. Also keep in mind that programs will not work if they are installed on another drive (not the system one) after changing the letter of this drive.
How to change the drive letter in Disk Management
In this example, I will tell you how to change the drive letter of Windows, using the Windows 10 operating system as an example. In exactly the same way, you can change the drive letter in Windows 7, Windows 8, Windows 8.1.
In order to change the drive letter, you must enter Disk Management. Right-click on the Start button and then click on Disk Management.

After this, the “Disk Management” window will open, which displays all the disks connected to the computer. I need to change the drive letter of the drive, so I scroll to the bottom. The CD-ROM drive is currently empty, so its dimensions are not displayed in the utility window.


In the next window, click on the “Change...” button.

Opposite the “Assign a drive letter (A-Z)” item, select any free letter. I need to assign the drive letter to "F", so I chose that letter.

In the warning window, click on the “Yes” button.

That's it, now, after opening Explorer, you will see that the drive letter has changed.

Conclusions of the article
If necessary, you can change the drive letter in Windows 10, Windows 8, Windows 7 for drives intended for storing data. You should not change the letter of the drive with the operating system installed, or the drive with installed programs.
In this article I will describe step by step how to change drive letter in Windows XP, Windows 7, Windows 8. This does not require any additional utilities or programs; everything is done using standard Windows tools. In this example, I will change the drive letter from “G” to “D” (the drive can be renamed to any free letter).
Attention: You cannot change the drive letter where the Windows operating system is installed. It is usually installed on the drive with the letter "C".
On My Computer/ Computer/ This Computer shortcut (depending on the installed operating system Windows XP/Windows 7/Windows 8) right-click and select " Control". The "Computer Management" window will open. If for some reason the specified method is not suitable, the "Computer Management" window can be opened in another way, click "Start" - "Control Panel" - "Administrative Tools" - "Computer Management" (in the version Windows 8, you need to right-click in the lower left corner and select "Control Panel" - "Administrative Tools" - "Computer Management", in Windows 8.1 version, right-click on the "Start" button and select "Control Panel" - "Administrative Tools" - "Computer Management").
In the "Computer Management" window, click "Disk Management", select the drive whose name you want to change, right-click on it and select "Change drive letter or path..."

In the window that opens, select the drive and click the "Change" button.

Select an available drive letter.


After this, you will see another message stating that if you change the letter, some applications will not be available, click “Yes”.

Greetings, dear guests!
In this article you will learn how to change drive letter in Windows 10, be it an additional partition with an archive of films/programs, for example, or a flash drive, or a removable hard drive. Only for the system partition (drive C, as a rule) you cannot change the letter. The instructions are written for Windows 10, but they can also be used for previous versions of the OS.
Let's get straight to the point. Right-click the Start menu and select Disk Management.
Three more options to go to Disk Management, for those who are not looking for easy ways and want to know everything:

So, a window with a list of disks opened. If you are logged in through Computer Management, select the item on the left Disk management in the Storage devices section.
Right-click on the drive you want to change letter to. Select menu item Change drive letter or drive path...

In the next window, select your disk in the list and click Change.

Next, a new window will pop up in which the item is already highlighted Assign a drive letter (A-Z). To the right of it, select the desired letter in the drop-down menu. Only free letters that are not already occupied by other drives are displayed.

After clicking OK, you will see this warning, indicating that some programs that use this drive letter may stop working. If you installed any programs or games on a separate partition, then I do not recommend changing the letter of such a drive, otherwise problems with launching these games/programs will begin later.
In general, agree to continue, click OK.

That's it, the drive letter has now been replaced with a new one.
P.S.: Some shortcuts may stop working for you if they referred to this disk or a file from this disk. Therefore, check the functionality of such shortcuts.
Still have questions about replacing drive letters? Ask, I will answer.
Do you want to change the standard drive letter to a more original one? Or, when installing the OS, the system itself assigned drive “D” and system partition “E” and you want to put things in order? Do you need to assign a specific letter to your flash drive? No problem. Standard Windows tools make this operation easy.
Windows contains all the necessary tools to rename a local disk. Let's look at them and the specialized Acronis program.
Method 1: Acronis Disc Director
Acronis Disc Director allows you to make changes to your system more securely. In addition, it has ample capabilities in working with various devices.

In a minute, Acronis will perform this operation and the disk will be determined with a new letter.
Method 2: "Registry Editor"
This method is useful if you want to change the letter of the system partition.
Remember that you absolutely cannot make mistakes when working with the system partition!

Method 3: Disk Management

All is ready.
Be extremely careful when renaming the system partition so as not to kill the operating system. Remember that programs have the path to the disk specified, and after renaming they will not be able to start.